
Two roller blinds can be installed side by side or linked with a manufacturer-approved coupler system. Side-by-side shades normally operate independently, while a compatible coupler allows multiple roller tubes to operate from one motor, crank, or approved control.
Standard roller blinds cannot automatically be connected with generic brackets or a rod between their chains. Confirm that the tubes, brackets, controls, dimensions, and coupling components are designed to work together.
Different Options to Connect Two Roller Blinds Together
“Side by side,” “linked,” and “dual roller” describe different configurations. Side-by-side shades cover adjacent sections of a wide opening. Linked shades use a compatible coupler between roller tubes. A dual roller system holds two fabrics in front-to-back positions, usually with separate controls.
The appropriate configuration depends on whether the shades will operate independently, share a coupler, or use a front-to-back double roller bracket.
Link Two Roller Blinds Using Joining Brackets

When two roller shades are installed side by side, a center bracket can support the adjacent roller ends. If both shades are intended to operate together, the system also requires a compatible coupler between the roller tubes. Brackets alone do not synchronize their movement.
The center gap depends on the bracket design, controls, fabric deductions, roller-tube diameter, and installation. Roller shades use fabric panels rather than slats, so slat alignment and “2-on-1 headrail” guarantees for horizontal blinds do not apply.
Install Linked Blinds Using Double Roller Blind Brackets
A double roller bracket system holds two roller shades in front-to-back positions within the same opening. It is commonly used to combine a solar or light-filtering shade with a room-darkening or blackout shade.
The two shades usually have separate controls unless the product documentation specifies a synchronized operating system. A double bracket does not automatically link both shades or make them move simultaneously.
Go with a Dual Layered Blind Concept
A dual-layer roller shade places two fabrics in front-to-back positions at one window. One shade may use solar or light-filtering fabric, while the other uses room-darkening or blackout fabric.
These shades normally operate independently and should not be confused with side-by-side linked shades. Blackout describes the fabric’s light-blocking ability; light may still enter around the edges. Fabric-specific UV, privacy, and thermal performance should be verified before ordering.
Tools and Materials You May Need
- Two compatible roller shades
- Manufacturer-approved center brackets or coupling hardware
- A tape measure and level
- Fasteners appropriate for the mounting surface
- Product-specific installation tools
- The supplied chain-tensioning devices for any continuous-loop chains
- A drill and suitable bit when required by the mounting instructions
- A second person for wide or heavy shades
How to Connect Two Roller Blinds Step by Step
Step 1: Accurately Measure Width of Window Frame
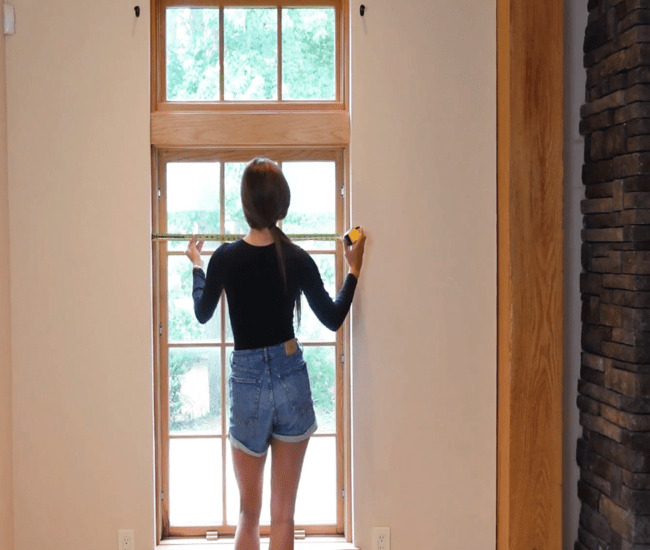
Measure the window opening at the top, middle, and bottom, and identify where the center bracket and fabric gap will align with the window mullion. Follow the roller-shade measuring guide and apply only the rounding or deduction rules supplied for the selected linked system.
Step 2: Exactly Measure Height

Measure the height at the left, center, and right. Record all three values and follow the selected product’s instructions for inside- or outside-mount sizing.
Do not make automatic deductions or assume that every product should be ordered at the exact opening size. Manufacturer deductions, bracket clearances, and fabric widths vary.
Step 3: Buy Two Roller Blinds According to Measure
Select two roller shades that are approved for the intended configuration. For side-by-side coverage, confirm the center gap, bracket positions, tube diameters, control locations, and maximum combined width. If using a linked system, both shades and the coupler must be mutually compatible.
Side-by-side roller shades generally do not overlap in the center. Position the expected fabric gap over a window mullion when possible.
Before choosing the two units, use the roller shade buying guide to compare compatible fabrics, controls, mounting styles, tube limits, and hardware options.
Step 4: Attach Brackets to the Wall or Window Frame

Mark and level the bracket positions, then secure the brackets to a structurally suitable mounting surface using the specified fasteners. Do not drill into a window frame without checking its material, installation instructions, and warranty requirements.
Confirm whether the shades will be installed inside or outside the opening. The guide to inside- or outside-mounted roller shades explains the differences in recess depth, coverage, and bracket placement.
Step 5: Install the First Roller Shade
Install the first roller tube in its designated brackets according to the product instructions. Support both ends and confirm that the control and idle ends are fully seated.
Step 6: Install the Second Roller Shade
Install the second roller tube in the remaining brackets. Confirm that both bottom rails are level, the fabrics clear each other, and neither shade rubs against the center hardware.
Do not trim the fabric or bottom rails unless the manufacturer provides an approved alteration procedure.
Step 7: Connect the Two Roller Blinds
Install the manufacturer-approved coupler between the adjacent roller-tube ends according to the system instructions. The coupler—not a rod between the control chains—transfers movement from the powered or controlled shade to the linked shade.
Do not attempt to connect two independent chain loops. If the shades were not designed for coupling, operate them separately or replace them with a compatible linked system.
Note: If you are having trouble with these DIY installation steps, it is a good idea to seek the assistance of an expert.
FAQs
Can you put two blinds side by side?
Yes. Two roller shades can be mounted side by side using compatible outer and center brackets. Measure the complete opening, align the center gap with a mullion when possible, level the brackets, and install each shade according to its instructions. Do not place brackets directly against one another unless the hardware is designed for that arrangement.
How do linked roller blinds work?
Linked roller shades use a compatible coupler so multiple roller tubes can operate from an approved shared control. Side-by-side shades without a coupler operate independently.
The center fabric gap varies by bracket design, controls, tube size, product dimensions, and installation. Do not promise a universal 19 mm gap unless that measurement comes from the selected product’s specifications.
How do you cover the gap between two roller blinds?
A center gap cannot always be eliminated because roller-shade fabric is usually narrower than the complete hardware width. To make it less noticeable, position the gap over a window mullion, select a compatible coupled system with a smaller documented gap, use one wider shade when dimensions permit, or add independent drapery coverage.
Review these roller-blind gap solutions before ordering, especially when the center gap will not align with a window mullion.
Need More Help?
Need help determining whether two roller shades can be coupled or must operate independently? Contact Affordable Blinds or call (800) 863-6109 to confirm compatible brackets, controls, measurements, and installation requirements.