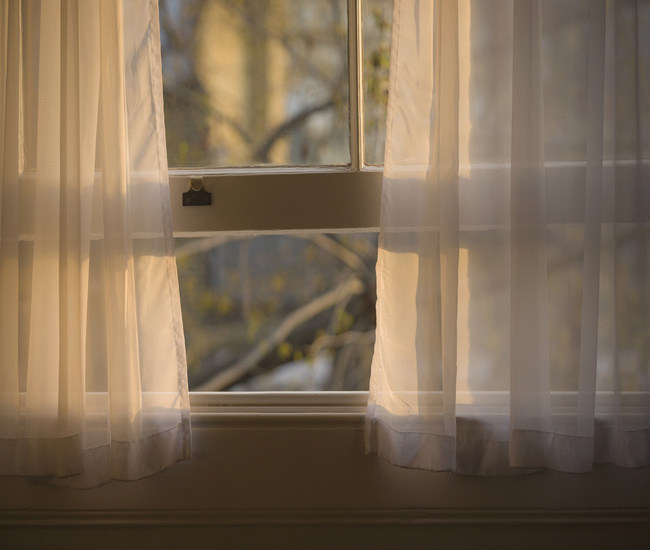
To layer sheer shades with curtains, install the sheer shade closest to the glass and mount the curtain rod far enough in front of it for the panels to move without touching the headrail, fabric, bottom rail, or controls.
An inside-mounted shade with an outside-mounted curtain rod usually provides the cleanest separation, but an outside-mounted shade can also work when sufficient wall and rod clearance are available.
The shade should control filtered daylight and the view, while the curtains provide additional privacy, room darkening, color, or softness.
Before combining sheer shades with curtains, measure the complete projection of the shade and confirm that both treatments can operate independently.
Best Layering Configurations
| Sheer-shade mount | Curtain placement | Best use |
|---|---|---|
| Inside-mounted shade | Rod mounted above and outside the frame | Clean separation and visible window trim |
| Outside-mounted shade | Rod projected beyond the shade and headrail | Windows without enough inside-mount depth |
| Shade inside a recessed opening | Curtains mounted near the ceiling | Taller appearance and full wall coverage |
| Multiple shades across wide windows | One continuous curtain rod | Visually unifying several window sections |
| Motorized sheer shade | Curtains mounted clear of moving fabric | Hard-to-reach or frequently adjusted windows |
The correct configuration depends on the window depth, shade headrail, trim, curtain weight, available wall space, and desired coverage.
Because the two constructions operate differently, compare zebra shades and sheer horizontal shades before determining the required curtain-rod clearance.
Decide What Each Layer Should Do

Before selecting hardware or fabric, give each treatment a clear role.
The sheer shade may provide:
- Softened daylight
- Adjustable glare control
- A filtered outdoor view
- Daytime coverage
- A finished appearance when the curtains are open
The curtains may provide:
- Additional nighttime privacy
- Greater room darkening
- Coverage over side gaps
- Color, pattern, or texture
- A softer frame around the window
Avoid choosing two layers that perform exactly the same function unless that duplication is intentional. For example, lightweight decorative curtains may add style but provide little additional privacy. Room-darkening curtains can add coverage but will change how bright the room feels when closed.
Step 1: Confirm the Sheer-Shade Mount
An inside-mounted sheer shade sits within the window recess. This arrangement normally leaves more wall space available for the curtain brackets and allows the curtains to pass in front of the trim.
An outside-mounted shade sits on the wall or trim surrounding the opening. Its headrail and fabric project farther into the room, so the curtain rod needs additional clearance.
Before selecting either configuration, compare the requirements for inside- and outside-mounted window treatments. Confirm the minimum mounting depth, finished shade dimensions, bracket locations, and any manufacturer deductions.
Step 2: Measure the Complete Shade Projection
Do not measure only the fabric. Measure how far the headrail, cassette, brackets, bottom rail, and controls extend from the wall or window frame.
The curtain rod must project far enough for the curtain panels to:
- Open and close without rubbing against the shade
- Hang vertically without resting on the headrail
- Clear any continuous-loop chain or tension device
- Avoid interfering with a motor, battery pack, or charging connection
- Remain clear of the shade while it raises or retracts
Use the manufacturer’s dimensions when available. If the shade is already installed, measure from the wall to the outermost component and allow additional clearance for curtain folds.
Step 3: Determine Curtain-Rod Height and Width
Mount the rod high enough that the curtains do not crowd the shade’s headrail. The exact height depends on the ceiling, window trim, curtain length, and bracket design.
Extend the rod beyond both sides of the window when wall space permits. This allows the open curtains to rest beside the glass rather than covering much of the window.
Before drilling, mark:
- The center of the window.
- The intended height of the rod.
- The bracket position on each side.
- The curtain’s finished length.
- The location of wall studs or suitable anchors.
- The projection required to clear the shade.
Use a level to confirm that both brackets sit at the same height. Hardware must be appropriate for the curtain weight and mounting surface.
Step 4: Choose Curtains Based on Function
For Soft, Decorative Layering
Choose unlined curtains in a fabric that frames the sheer shade without making the combination visually heavy. This works well when the shade already provides the required light control and privacy.
For Better Nighttime Privacy
Use lined or more opaque curtains that close completely across the window. Sheer shades can become more visible from outside when interior lights are on, so the curtain layer should provide enough coverage for the room.
For privacy-sensitive rooms, review what people can see through sheer shades at night before choosing the curtain opacity.
For Room Darkening
Select room-darkening or blackout curtain material, but remember that light can still enter around the rod, curtain edges, center opening, or floor clearance. Wider panels and adequate wall overlap generally provide better coverage.
For Visual Contrast
Pair a quieter shade fabric with curtains that add color, pattern, or texture. If the shade already has visible zebra bands or prominent horizontal vanes, heavily patterned curtains may make the window look busy.
Order samples and view the shade and curtain fabrics together under daytime and evening lighting.
Step 5: Install the Sheer Shade First
Install the shade before the curtain rod so its final position and projection can be confirmed.
Follow the product instructions for bracket spacing, fasteners, headrail attachment, control placement, and fabric alignment. Operate the shade through its complete range before adding the curtains.
Confirm that:
- The shade raises and lowers evenly.
- Vanes or bands adjust without rubbing.
- The bottom rail remains level.
- The fabric clears handles and locks.
- Any chain-tensioning device is installed correctly.
- Motorized components remain accessible.
If you have not ordered the shade, follow the applicable window-shade measuring instructions rather than making unapproved size deductions.
Step 6: Install the Curtain Rod
Position the curtain brackets using the projection established earlier. Secure them to studs or use fasteners rated for the wall material and combined weight of the rod and curtains.
After installing the rod, place the curtains on it and close them across the window. Check that the panels hang freely rather than resting on the shade.
A standard shade-and-curtain combination usually needs one curtain rod, not a double rod. Double rods are more appropriate when combining sheer curtain panels with outer drapes.
Step 7: Test Both Treatments Together
Operate the complete system before considering the installation finished.
- Test the following positions:
- Shade open with curtains open
- Shade lowered with vanes or bands open
- Shade closed with curtains open
- Shade open with curtains closed
- Both treatments fully closed
- Curtains stacked at each side while the shade retracts
Watch for rubbing, snagging, fabric bunching, obstructed controls, and contact with the bottom rail. Motorized shades should be tested several times to confirm that curtain folds cannot enter the shade’s travel path.
Common Layering Mistakes
Mounting the Rod Too Close
Insufficient projection causes curtains to rub against the shade, distort the fabric, or obstruct the controls.
Covering the Control Mechanism
Curtains should not block a cordless bottom rail, continuous-loop chain, wall switch, charging port, or motorized control component.
Ignoring Curtain Stack Width
Curtains need enough rod width to rest beside the window when open. Without adequate side space, they may cover the sheer shade and reduce the available daylight.
Selecting Both Layers Separately
Evaluate the shade and curtain samples together. Undertones, textures, and transparency may appear compatible online but look different when installed at the same window.
Expecting the Combination to Guarantee Blackout
Layering can improve room darkening, but results depend on fabric opacity, mounting style, rod placement, overlaps, and edge gaps. Confirm the performance of each component rather than relying on the number of layers.
Final Answer
The most practical way to layer sheer shades with curtains is to place the shade nearest the glass and mount one curtain rod above and in front of it. Inside-mounted sheer shades generally make this arrangement easier, but outside-mounted shades can work when the rod projects far enough to clear the headrail and fabric.
Successful layering depends on assigning each treatment a purpose, measuring the shade’s full projection, providing enough rod clearance, selecting compatible fabrics, and testing both treatments through their complete operating range.
Note: this is general guidance, you can follow specific manufacturer guidelines for installation of sheer shades with curtains.
Leave a Reply